Andrey Bulatov shared a breakdown of his realistic 3D environment Old Manor made under the mentorship of Sergei Panin.
In case you missed it
You might find these articles interesting
Introduction
Hello everybody, my name is Andrey Bulatov, I was born and raised in Moscow, Russia. For the last 2 years, my main activity has been a professional architectural visualization. I took my first steps in 3D back in 2015 while studying design, and 3D graphics were helping a lot with the student projects. After graduation I started working for an architect design bureau but, considering I’ve been a passionate gamer since childhood, I decided that shifting to the game development industry would be a dream coming true. That’s why I decided to find a mentor.
Speaking of the current events, the whole Coronavirus situation is quite depressing, the city is basically shut down, and I’m doing my part on flattening the curve the best I can. Personally, it affected me by pushing back the perspective of getting an office job I was counting on. On the other hand, this is the best time to breathe life into postponed ideas or to work on freelance projects.
Mentorship
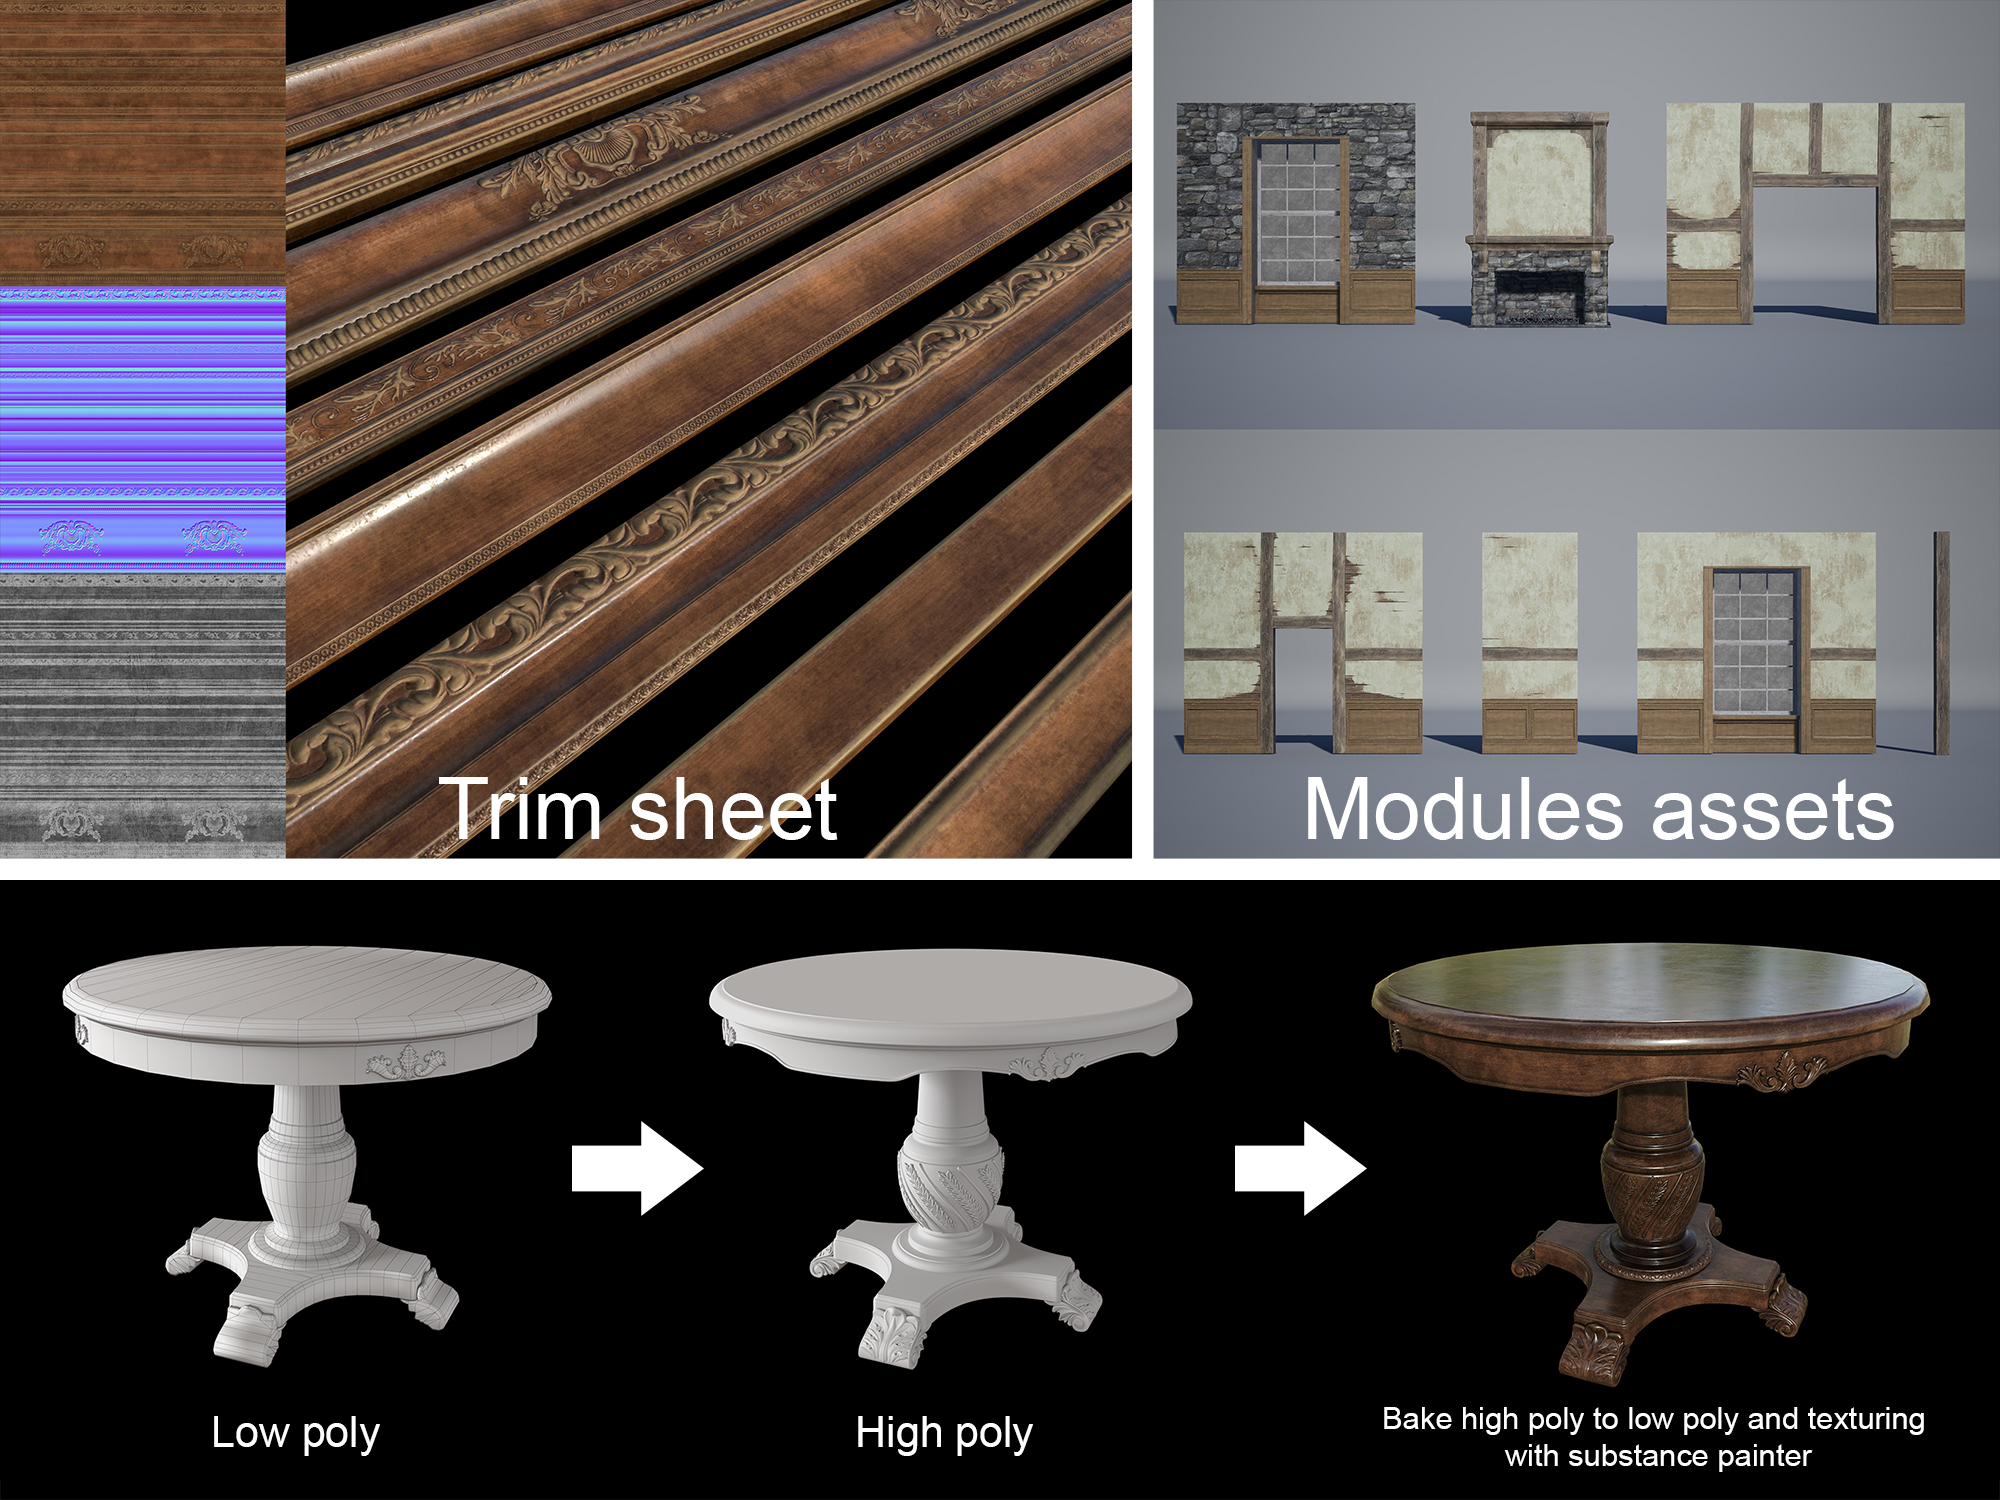
The main goals of the mentorship were to gather material for the portfolio, learn game development pipelines, such as module structure development, creating trim sheets, baking high poly to low poly, texturing with Substance Painter, and of course, enjoy the process on the way.
The working process would initiate with analysis of the work done, and then we would discuss new ideas, what else could be added or improved. I was given practical advice on how to obtain the best results, where and how to use different techniques at their most. When needed, Sergei was showing me the process in real-time, as well as supplying me with useful material to study on my own. At the end of the session, we would agree on the amount of work to be delivered by the next lesson.
Old Manor: Pre-Production Stage
First of all, we decided the location will be based on concept art, where specific art tasks were sorted out. We discussed the possibility to expand the location regarding the concept, with no intention of making it the very same. A few days were spent in the search for the right concept art. We selected about 50 works from which, ultimately, chose Evgeniy Musienko's concept. I really liked this one as I was attracted by the gloomy and thrillingly mystical atmosphere.
After Sergei agreed on it, the next step followed – the search for references. We determined to make the location in a realistic style, therefore, it was important to make the items included in the concept look real, at the closest to their exact appearance. I cut out objects included in the concept, numbered, and organized them into files. This helped to determine, at least roughly, the amount of work to be done on objects’ creation, and to ease the reference structurization for each individual object. It summed up to 45 files, filled with references.
The search for references took a fair amount of time. I watched movies and TV series depicting England of the 17th century, browsed through Google and Pinterest, and eventually gathered enough references for every object needed. There were references for specific objects, references for surroundings, for damage, mood and atmosphere, and references for an approximate level of graphic quality I wanted to end up with. This step, in my opinion, is one of the most important in the whole work because cause the more interesting the references are the more vivid and realistic the location becomes in result. Besides, references considerably increase the chances to finish the project. A quick review will breathe inspiration and bring fresh ideas on what could be further modified and improved.
Establishing the Base of the Scene
The first thing I did was the scene blockout in the engine in order to determine the basic scales and get as close as required to the concept proportions.
Afterward, based on the walls in the blockout, I selected the most appropriate sizes for the modules. They were supposed to be assembled neatly, like a whole construction, adjusting to each other without any visible seams.
This was obtained with good UV mapping. Considering that the walls are taking up a pretty large part of the location, it was essential to make them interesting and hide the tiling. To achieve that, I created a material with three layers that were blended in vertex painting. Those layers consisted of textures with wooden beams and two different types of plasters. In addition, I could draw fissures on top of them.
Basically, with the snapping activated, I was dragging the modules on the scene, set them down to each other, and paint them in vertex. This way, I hid the tiling and gained a pleasant look. I used decals as a final touch to make them look more attractive and diverse.
Approaching the Production Efficiently
Using trim sheets is a good technique. A trim sheet is a texture with a number of elements that can infinitely tile to one side. This way, I gained high texel density while saving on draw calls as well as sped up the asset production. Building one asset might take a few days, but using trim in the process allows making a whole pack of assets relatively quickly. Thus, by modifying and reforming the trim we improve the assets based on it while just reloading the texture. Using this approach makes assets quite similar. On the one hand, individuality is not always needed, and on the other, a smart layout of the objects in the scene, decals, and small props make monotony less obvious.
Modular structures come in handy, as they help to save time and obtain good results. With them, I don’t have to open the 3D modeling application every time to edit separate meshes of the room or architecture. Modules enable you to adjust the space, expand and change it, and get quick iterations in the engine. Thanks to the modular structures, I easily expanded the concept and added two more rooms that weren’t planned in the beginning.
It’s very important to keep in mind things like an effective file structuring, material instancing, blockout, and, of course, references. File structuring will help avoid messing the project, instancing will save time in working with materials, blockout will help to quickly prototype the surroundings and test their performance, and proper use of references will make the work look more interesting.
As for optimization, polygons, and other technical limitations, I didn't pay much attention to that. The content was created following the game dev pipeline with an optimal number of polygons. I didn’t use high poly geometry in the scene or built overly complex shaders, most of them have around 140 instructions. The computer I work on is powerful enough so I didn’t feel any discomfort during the whole development process, and the final scene has around 100 FPS.
Investigation Room
Initially, this room wasn’t planned at all, just like the room on the second floor, but we wanted to make the work more captivating, so Sergei and I decided to add some story to it. We discussed a few ideas and ended up choosing the investigation room, where the main object would be a map with different papers and pictures pinned on it and case files thrown all over the place. We intended to point out the character’s obsession with the case. He was so haunted by it that he forgot about everything else, bringing the house to a deplorable state of neglect.
The next thing I made was the room’s blockout. Following it, I created the furniture items and added the modules. Next, I converted the main composition objects to mesh and exported it to Marvelous Designer for the map simulation. I intended to make the map feel alive, fascinating, and authentic for this place, connected to the whole lot around. When the result was good enough, I added it to the scene.
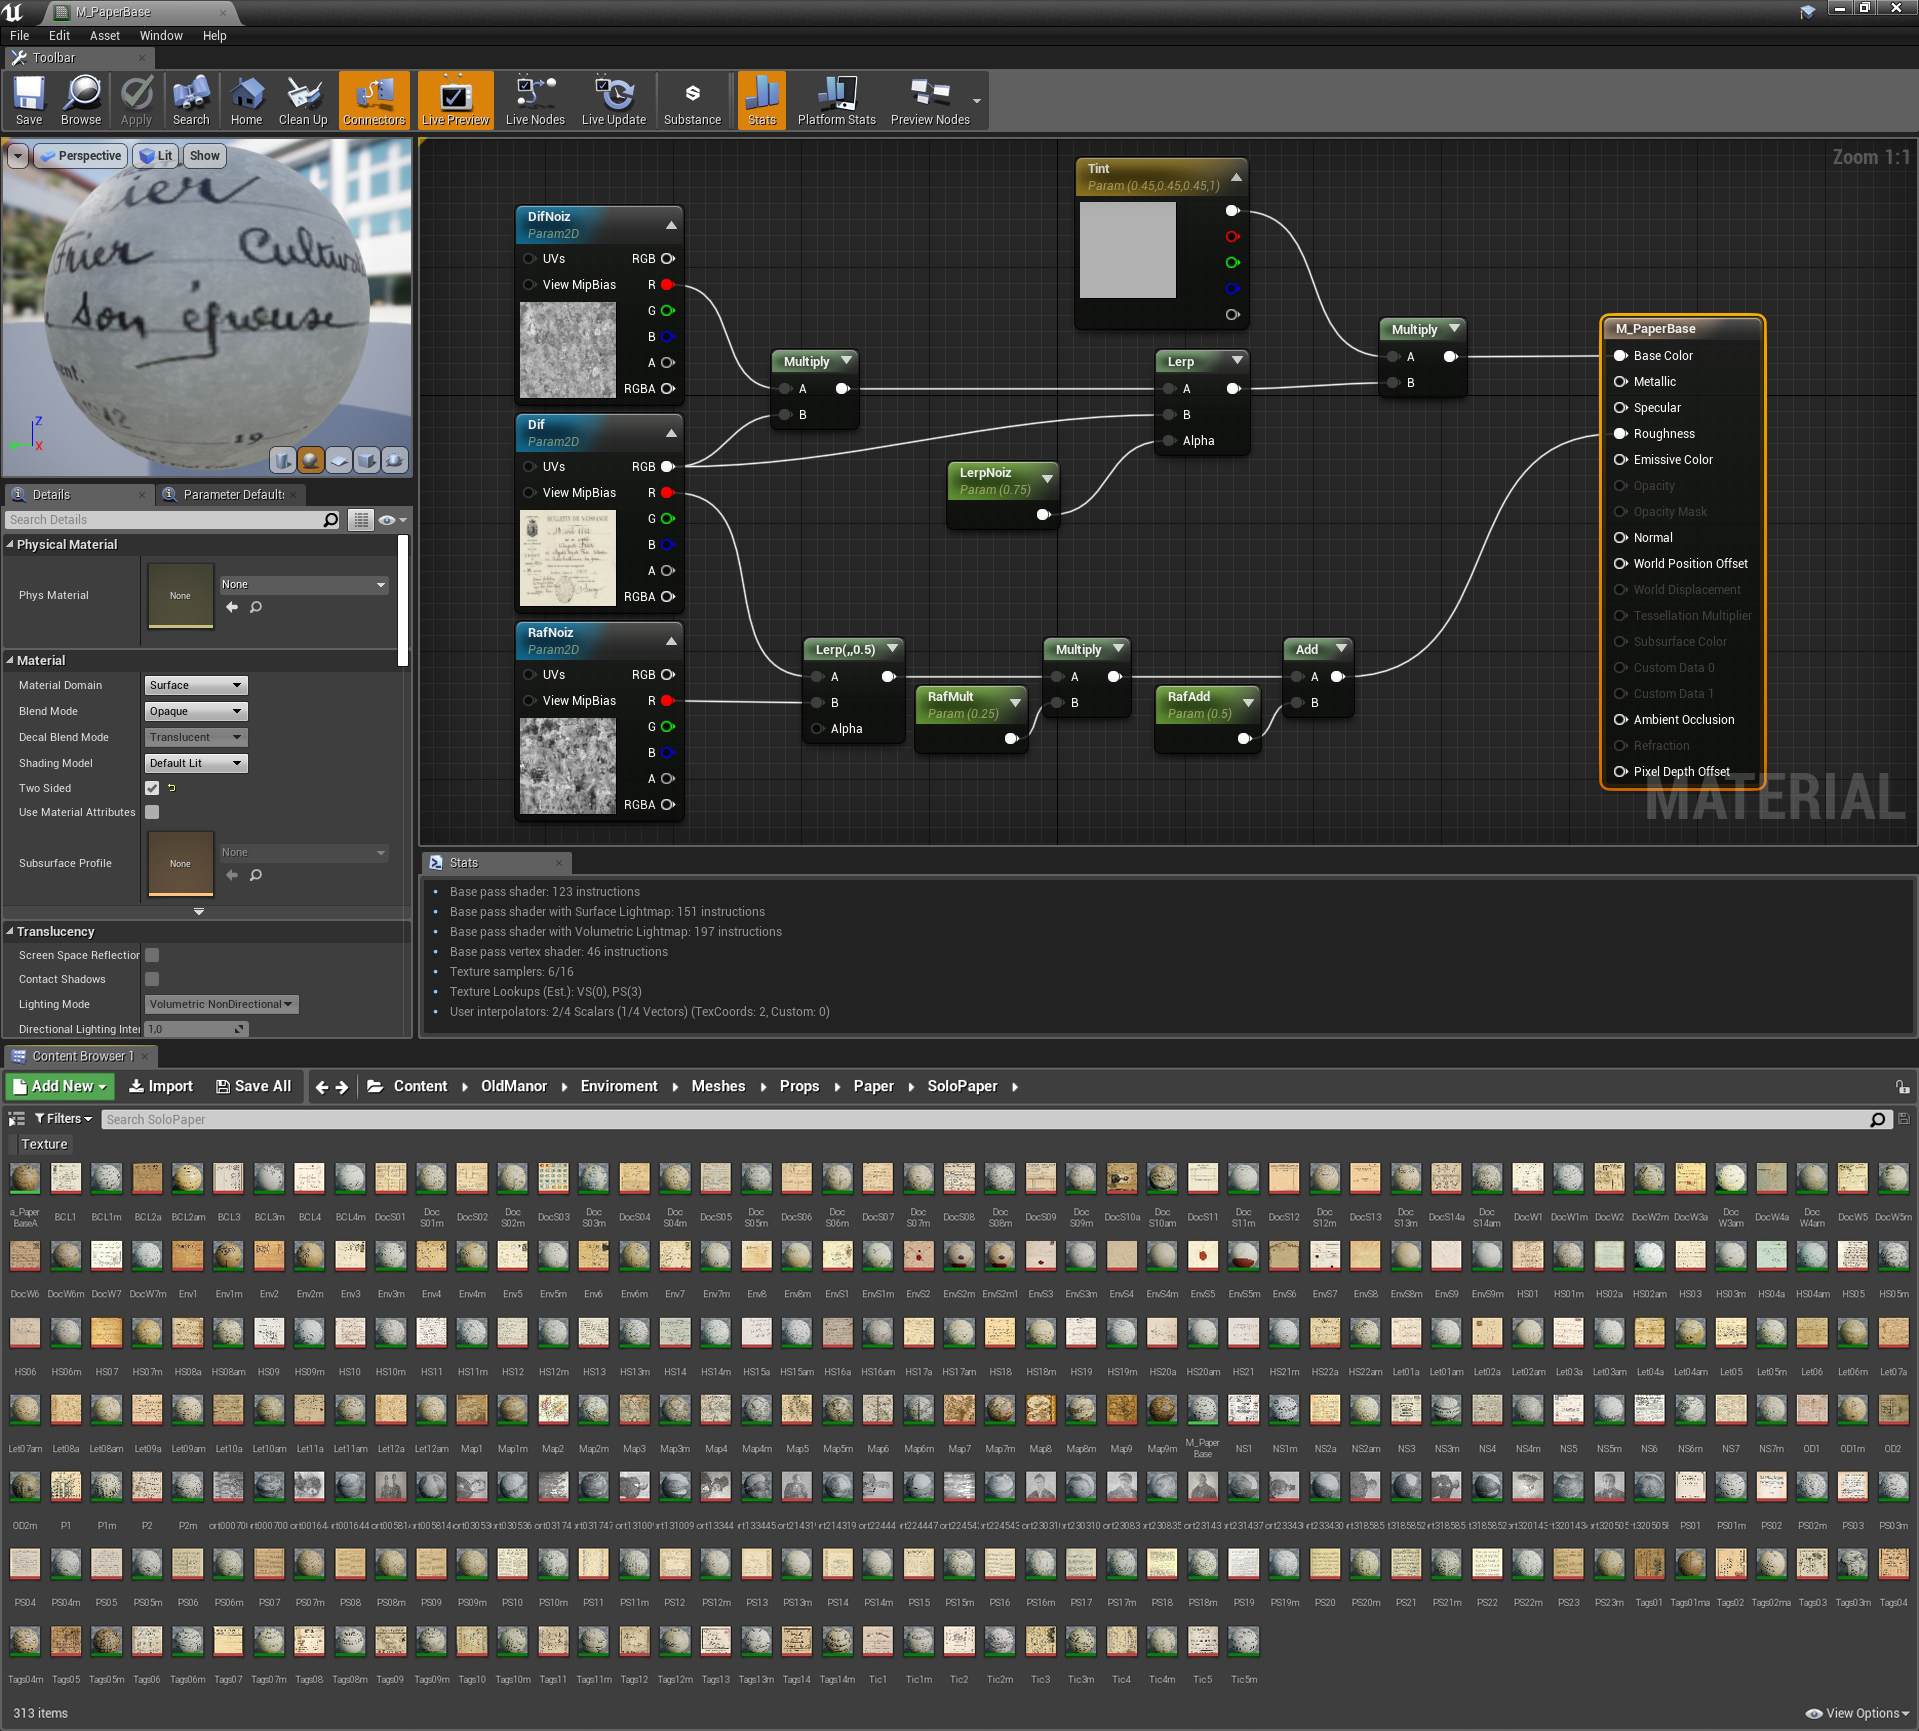
The next thing was to find the textures for the map, papers, letters, and the rest of the materials to subsequently create the place. Assets from Quixel were used for the same reason. I spent a few days finding and improving textures and ended up with more than 150 of them in total because I wanted as little repetition as possible. I created individual master material for them which was handier to work with.
Taking inspiration from references for the mess and being guided by my aesthetic sense, I started to fill the board map with different materials and pictures, as well as build the common scene. The spider web, which was created in the engine, came to be the final touch. It was made out of two objects, cylinder and knot, with triplanar mapping material set on them, used in order to speed up the process.
At the start, the room was planned to be seen from only one angle, through the door slit, and it wasn’t supposed to be so elaborate, but working on it captured me fully. I enjoyed building it so much that it came up to be a lot more complex.
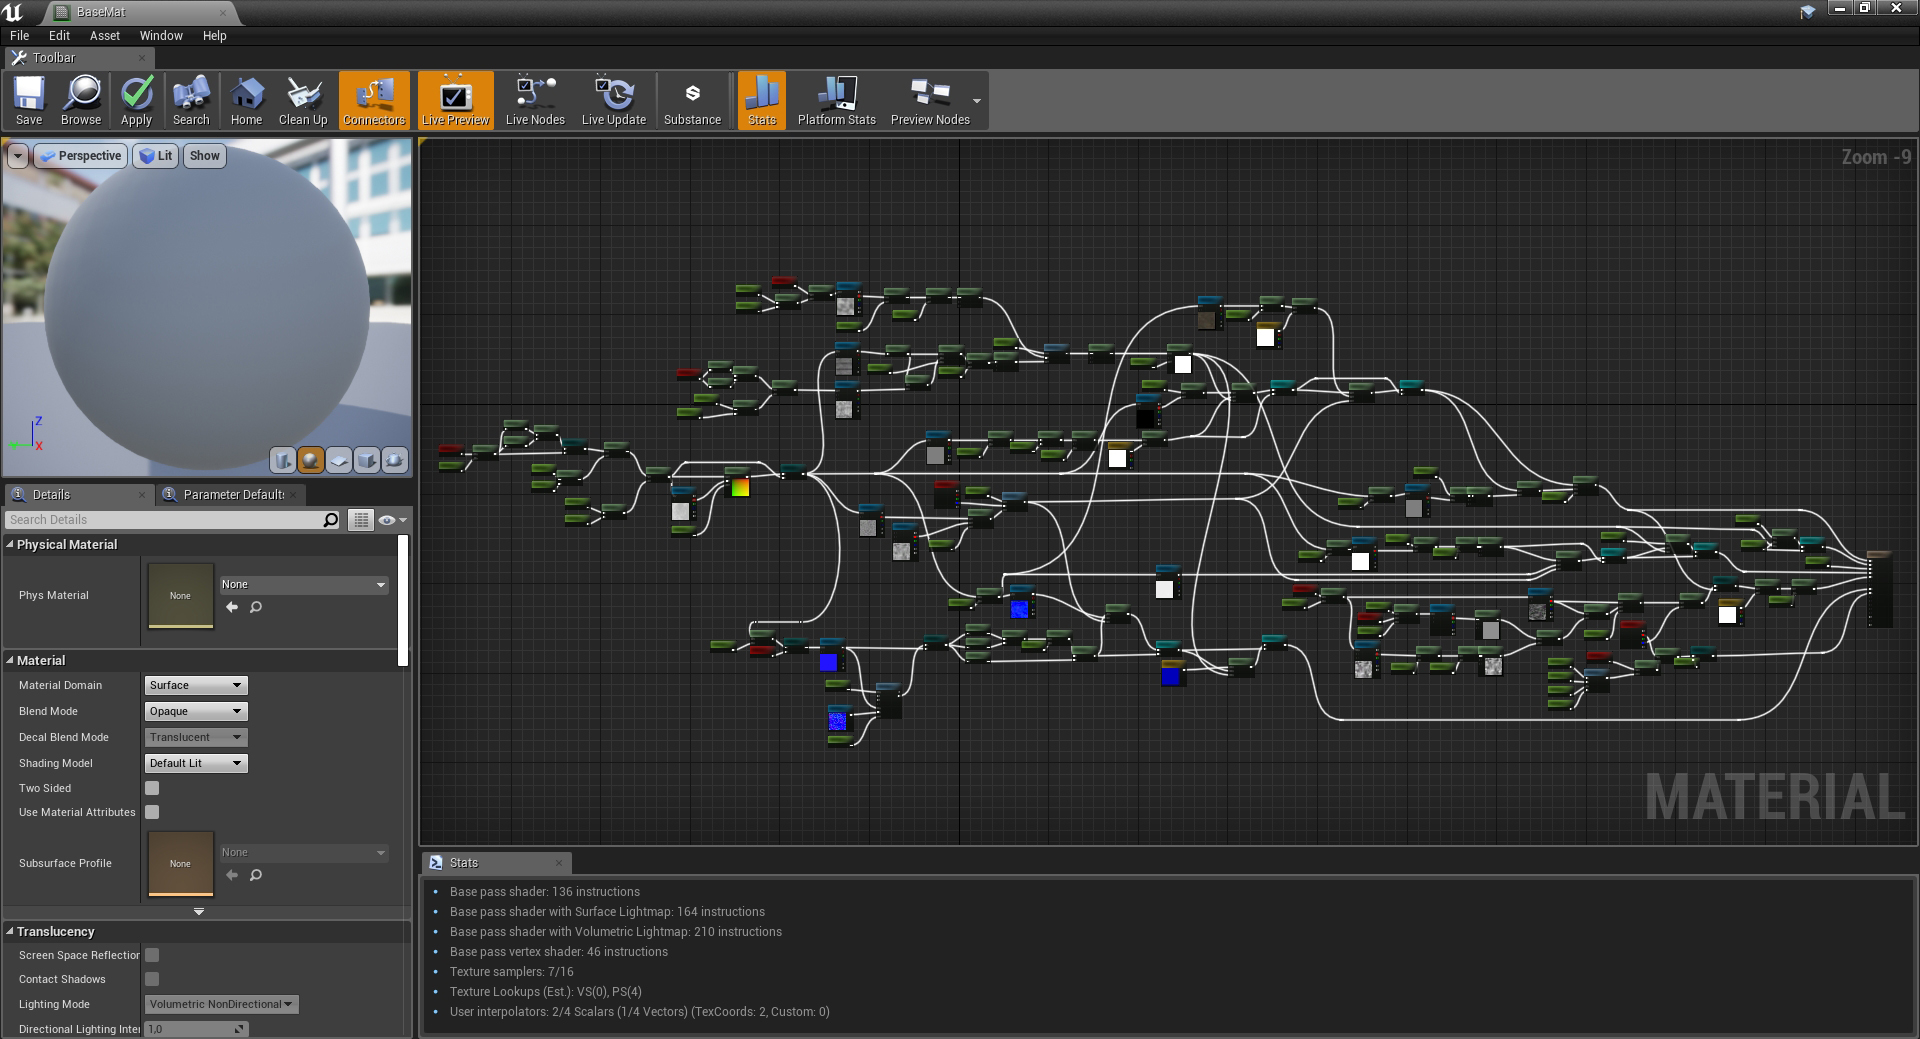
Materials
The main materials were made using the standard pipeline. I built a master material based on which I could get a lot of instances. Initially, the material was pretty simple, but in the working process more and more different parameters added up, and so, the material grew as well.
Other master materials were made based on duplication of the basic master material, but I had to change Material Domain or Blend Mode, or I had to rewrite the sequence logic with ARM textures exported from Substance.
Besides the standard pipeline in Substance Painter, a large amount of material was taken from Quixel. I paid particular attention to the plaster material that had a few layers and to the transition between those layers. I made a function that would determine vertex paint borders and convert them into Normal Map in order to create a more realistic portrayal of borders between the layers.
Lighting
The lighting was developed through iterations. I tried out different scenarios and various settings for the light source. Entirely, light can be divided in two sections. The first section includes warm areas which would be the living room, the investigation room, and the bedroom on the second floor. The second section would be the staircase with prevalent cold tones. I intended to bring the last location closer to the concept and reproduce a similar atmosphere. The warm areas had two window-shaped rectangular lights, emitting light from each window. One was soft and warm with a large cone for overall light, and the second light was placed behind it with a sharper, cooler beam light for the back of the room. Thus, I could mix up the light from two colors, and gain tone diversity.
The staircase lighting was established using two rectangular lights, one in the window and one in the door. Apart from them, I set two dynamic directional lights, one warm for the living room and one cold for the staircase. With the light shift, I reached the effect of rays coming through the window, and, on top of that, I used god rays to imitate volumetric light.
I also applied sky light and distance fields to the scene. Besides, for specific shots, in order to emphasize artistic expression, I placed a large amount of spot lights to make nice flares and light spots.
Afterword
I started working on the location in September and planned to finish it in about three months, but then, we expanded the concept and added the story which resulted in more work. A lot more new objects were needed for the investigation room, plus, I really enjoyed and took my time designing it. I had also other visualization projects on the side, so I had to split my time. At the end of the day, it was a training project, meant to help me shift to game dev and learn how to create game locations. The main goals were not to finish the work strictly in time but to exercise the whole process, familiarize myself with the pipeline, learn game techniques, and most of all, get a proper practice in working with them. If I put aside the other work I was doing, the project took about four months.
All in all, I’m really happy with the result. Sergei is a very talented artist and a great mentor. I am extremely grateful for the nice piece of work we’ve done which is also a good addition to my portfolio. And I’m very happy to be given the chance to enlighten the whole development process to you guys, 80lv community, and share my thoughts on it. Thanks a lot!
Andrey Bulatov, 3D Artist
Keep reading
You may find this article interesting